At Lily and Sage Farm we have decided to get into processing our own Meat chickens. With the processing and pricing of groceries as a family we want to get into processing our own meat. To raise these meat birds we needed a way to brood and to raise them to age. For our first round we have decided to process Cornish Hens to sell to the community, but also freeze for our family. Below is how we decided to build our Chicken Tractor with some links to some of the products.
Materials used below
2X4X12 – Treated lumber – 3
2x4x8 treated lumber – 8
1/2″ hardware cloth role – 2 – https://amzn.to/3Y5nuIQ
Hinges – 1 – https://amzn.to/3LsI6Dg
Motion sensor lights – 2 – https://amzn.to/3W6P1a3
Cattle panels – 3 – 50″ X 16ft at Tractor supply company
Door latch – 1 – https://amzn.to/4f5BbNJ
Metal strap role – 1 – https://amzn.to/467MRM0
1″ 5/8″ wood screws – 1 box
zip ties – https://amzn.to/467xSl8
3″ wood screws
Building the tractor
- First, started off by building the base frame – We wanted to do 50 chickens at a time and typically you want about 1 square foot per meat chicken. The base we made was 8ft wide by 12ft long. Some people just leave the basic frame, but I decided to use corner supports by cutting down 1 8 ft board to 4 even lengths with 45 angles to support the corners for when we pull it with the tractor.
- After the base is made take the three cattle panels and get them setup inside the base. With the 50 inch sides up against the 12 foot long side. It should take 3 panels to span the full 12 feet. Then cutting the metal straping to small strips and using the scres attaching the cattle panel to the inside of the base. Make sure the panel is attached about halfway up the 2X4 to make sure it is not dragging on the ground. (people use metal U nails I have found those to fall out making it not as sercure).
- Once those are attached you need to build the back support and door frame. The way I decided to do this was find the center of the panel and count three sections to the left and right. Marked them with a black marker then took one of the 8 foot boards marked the angle and height on one of the sides to get the 4 peices that need to be cut set out.
- Once those are cut then need to be attached to the inside of the base and attached to the cattle panel at the top with the metal strapping and screws. form the front and the back
- In Michigan we have snow so I wanted to put a middle support piece. I then put a top frame peice in to complete the door frame and copied that at the back of the tractor.
- Place a 12 ft board across the top of both of those horizontal peices to add support to the cattle panel.
- Next step is to then cover the whole thing in hardware cloth execpt the door opening. Attaching the hardware cloth to the wood with staples or screws and metal strapping. Also attaching the overlaps and corners with Wire ties.
- Once that is done we need to build the door frame. I just built a rectangle to fill the opening with a 1/4″ of space to create room for it to open and close.
- Put hardware cloth on the door and attached it with the hinges.
- When installing the latch not forgeting to drill a hole to put the string through to make sure you don’t get locked in the tractor (which has happened).
- Then install the 12X16 tarp to cover the whole thing to make sure the chickens don’t get wet as meat chickesn should not get wet.
That is the basic Chicken tractor build that will work below are things I added for preditor proffing and ease of use.
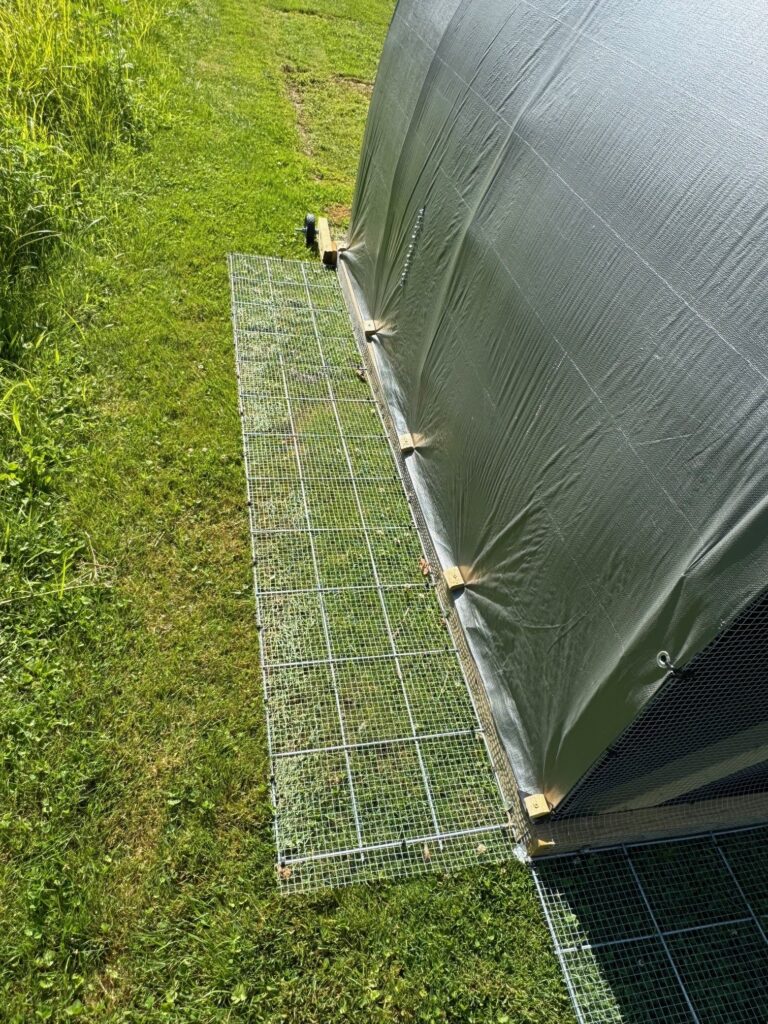
- I cut down cattle panels and placed hardware cloth on them that can fold up and down to make sure animals couldn’t dig below and get to the chicks
- Added motion sensor lights to the front and back to deter preditors
- Added hanging chains insdeo to hold food and water. Making it easier once pulling the tractor
- I also added wheels to the back and hooks to the front to make it easier to pull

Reference how to attach with metal strap and making sure it is off the ground. Steps 3 and 4.

How I attached the top of the door to the frame.

Just used standard hinges

Used a standard door lock

Wired up some heat lamps using outdoor extention cord wire and a plug that is water proof to help provie heat for the chicks

Added preditor proofing with the metal straps and hardware cloth that can be flipped up when moving for less drag.


